Cool Ways To Get Started On DIY Projects

This post may contain affiliate links.
Thank you for visiting Cori's Cozy Corner! Please make sure to like us on Facebook, follow us on Twitter and subscribe to our E-mails!

DIY is a great way to reduce the costs of decorating your home – as long as you do them right! It doesn’t matter whether it is a large project or small; there are opportunities to make savings everywhere. Let’s take a look at some of them now, and get ready to get your hands dirty!

6225533299_61a552e8a5_zImage Source

Search Online

Scared of DIY? Worried you will mess up? Well, there are hundreds of websites out there that offer free tutorials for anyone that wants to look. Have a peek at sites like Family Handy Man for some inspiration. There really is no excuse. If you want to start making improvements to your home, sites like these are all there waiting for you!

Get A Good Toolkit

No DIY enthusiast should be without a toolkit they can blame things on when things go wrong. You will need a fair amount to get you started, and spending a little more on quality tools will always be more cost-effective – and useful – in the long term. There’s a good list of essential tools for homeowners over at Houzz.com. Don’t forget the importance of looking after your tools. Clean and dry them well after you have used them to help their lifespan.

Start Small

It goes without saying that you should take things steady when you first start DIY projects. Learn essential skills on small projects first. You will find this will be a good basis to work from when you start on the bigger tasks.

Be Creative

The key to good DIY is to take those small essential skills and turn them into something creative. You don’t have to spend a lot of money for amazing results. Use your favorite home design resources for inspiration. The idea here is to borrow ideas rather than recreate them. That’s the great thing about do-it-yourself; you can get stunning results that are completely original to you.

Know Your Limits

When you are just starting out in DIY, it is really important to know your limits. Some things just should not be touched. Hire a professional electrician for any rewiring work that involves more than fitting a new plug. And if you are tiling your bathroom, have an emergency plumbing company on speed dial in case you mess up a water pipe.

Get A First Aid Kit

Accidents happen, unfortunately. And when you are just getting started, they will happen more often. The least you can expect is a nasty bang on the thumb and a few splinter. But you could cut yourself or slip and cause serious damage. Make sure you are prepared by keeping your first aid box well stocked.

Show Off

Your very first DIY effort may not be the nicest thing in the world to look at. But you made it. It came from your hands so you should be proud, no matter how many mistakes you have made. Don’t be afraid to show it off to family and friends. Even the experts amongst them. They could end up giving you even more tips!

Hope you enjoyed this little guide and can now get started on making home improvements yourself. Catch you next time, when maybe you could share your latest creations!

Cori's Cozy Corner Disclosure Policy

Fabulous and Affordable: Keeping the Costs of Your Wedding Down

This post may contain affiliate links.
Thank you for visiting Cori's Cozy Corner! Please make sure to like us on Facebook, follow us on Twitter and subscribe to our E-mails!

No one want’s to skimp on the biggest day of their lives, but is it really worth starting your life together with mountains of debt hanging over your heads from the wedding? With house deposits, children and holidays to save up for; we show you how to save your money for the things that really matter and still throw a wedding that’s the talk of the town.

Screen Shot 2014-12-22 at 5.15.04 PM

Image Source: Sean MacEntree

The Venue

In many cases, the venue is the most expensive part of the whole day. If you’ve had your heart set on one particular venue, there are plenty of things you can do to get it at a fraction of the cost.

A cancellation at a wedding venue may mean heartbreak for someone else, but for you it could be a godsend. If you are organised and can whip friends and family into action quickly, consider making the venue aware that you would be able to do a date at short notice. Very few brides are willing to be this flexible, so you’re not likely to have much competition. It is also worth remembering how much of the cost of the venue (if any) is non-refundable. This puts you in a strong position when talking price for a last minute opening.

If the chance for a last-minute bargain doesn’t present itself, consider booking the venue at a time when it is in less demand. Fridays and Saturdays are the most popular and therefore the most expensive days to get married. Opt for a Thursday or even a Wednesday to secure your venue at a fraction of the cost. Of course, you will need to give guests a decent amount of notice so they can book time off work well in advance.

If you are not limited on where you want to get married, think outside the box. Hiring a big holiday home for a week and holding the reception there is around the same price as a venue but you have the place for seven days. Take the bridal party with you and spend a few days enjoying local sights, visiting the salon and dressing the house for the big day. With everyone there, you can do much of the organising and decorating (and even some of the cooking) yourselves which keeps the costs down.

The Extras

The extras are what makes a wedding, they also add a serious amount to the cost. Utilising the goodwill and skills of family and friends at this point could save you hundreds, even thousands, before the day is over.

Do you know anyone that is an especially good baker? Great! Let them do the cake and you’ll not only have something personal and meaningful, you’ll have a hell of a saving to match. You could even suggest they do it as your gift so you can secure the cake for free!

Alcohol is another big expense when it comes to weddings. Don’t order it through the venue, they’ll inflate the cost. Buying it yourself at a cash and carry or online liquor store and paying the venue corkage will save you a small fortune and puts an end to open bar taps.

Whatever you decided, the trick to a fabulous wedding is one that feels personal. If you enlist the help of the people who love you, inject some personality into the day and (above all) relax, your wedding is guaranteed to be fabulous and affordable.


Cori's Cozy Corner Disclosure Policy

Make The Most Of Your Home With These Domestic Improvements

This post may contain affiliate links.
Thank you for visiting Cori's Cozy Corner! Please make sure to like us on Facebook, follow us on Twitter and subscribe to our E-mails!

I often get overwhelmed when I survey my home and notice all the things that need to be repaired and areas that could do with improvement. It is easy to become stressed out by this, especially if, like me, you don’t have the disposable income or time to sort them all out.

During one of my home improvement induced panic episodes, I turned to the internet for help. I was pleasantly surprised to find that I am in no way alone in this situation. In fact, there is a wealth of advice and “how to” guides addressed to people who want to make easy, quick and affordable improvements to their property.

After studying articles on home improvement at exploded home, as well as other blogs and websites, I dedicated the last two weekends to revamping my interiors. I am pleased to say that it has really worked; my home looks and feels completely transformed. With minimal effort, I have developed such a feeling of pride and comfort in my home. I feel compelled to help others achieve the same. So, here are my tips on how to make the most of your home with just a few easy domestic improvements.

Screen Shot 2014-12-22 at 4.45.07 PM

Image courtesy of Flickr.com


  1. Paint your way to a finer home

During your home improvement activities, paint will fast become your best friend. It is amazing the difference a fresh coat can make in brightening and enhancing your walls and furniture.

Over time, the interior walls of your home become dull and blemished due to general wear and tear. This can come in the form of chips, holes, dirt and scratches. If you are a parent, you may even notice the occasional grubby hand print or crayon mark.

To start, I went around my home and used post-it notes to mark the areas that needed a touch-up of paint. I used a mild household cleaner and warm water to remove any surface dirt. I was then left with the blemishes that required a lick of paint. Luckily, I had an assortment of paint tins stored from previous DIY jobs and so I didn’t need to spend any money on this domestic improvement.

If you don’t have any leftover paint, I would recommend picking up a few tester-sized tins. These will provide more than enough paint for touch-up work and only cost a couple of dollars per sample. How long this task will take depends on how scuffed your walls are. However, it shouldn’t take any more than a couple of hours. When touching up walls, make sure you are using the same color and that you apply the paint in the same way and direction as the rest of the wall.

However, if you think your home would benefit from a more extensive paint job then you’ll need to purchase a full-sized tin of paint. DIY store own brands are usually the most economical option. Any paint that you don’t use will come in handy when you need to cover up any marks in the future. There is an abundance of information available online on how to paint your walls quickly and easily.

Screen Shot 2014-12-22 at 4.46.29 PM

Image courtesy of Flickr.com

2. Revitalise your tired furniture

There is always something you can do to fix and refresh your worn out furniture.

Gently use a baby wipe or microfiber cloth with a little vinegar to remove stains from your upholstery. After spot cleaning, your upholstery may benefit from an overall clean and rinse. Most sofa cushion covers can be removed and machine washed, but do check the cleaning instructions before doing this. Alternatively, mix a little mild laundry detergent with some warm water and apply all over the furniture using a cloth.

Any loose threads can be snipped or sewn back into the material. Holes or rips in upholstery can be fixed easily using a needle and thread, fabric glue or they can be patched up with spare material.

Surface scratches on wooden furniture can be removed by applying a paste wax to the surface and buffing the area. The wax will fill the scratch mark and the buffing will even out the surface. If the scratch goes deep into the wood, before applying the wax you should use shoe polish or colored pencils, for example, to make the blemish match the surface color of the wood.

As well as cosmetic fixes, you can give your interior a new twist with a few finishing touches to your furniture. Your cabinets may benefit from a fresh coat of paint or varnish and some interesting new handles. And your sofas and chairs will look refreshed when covered with beautiful cushions and throws.

Screen Shot 2014-12-22 at 4.47.54 PM
Image courtesy of Flickr.com

3. Make your home sparkle

I spent one day doing a proper clean, and I have to say, it was by far the biggest improvement I made. I concentrated on the things I don’t always have time to do like buff the faucets and clean the inside of the windows. Yes, it took the best part of the day to complete, but it was worth it, and I know I won’t have to do it again for a while.

Crystal clear windows will make your home look bright and spacious. You can clean your windows like a proif you are equipped with the right utensils. Instead of using a paper towel and spray, get yourself a squeegee (these products range from $20 to $100, but are well worth the money). With this piece of equipment, I halved the time I would normally spend on the windows. Apply some soapy warm water to your windows using a sponge and simply clean away the water with the squeegee for a spotless, streak-free finish.

During your deep clean, pay some attention to your chrome and stainless steel items. Believe me, this will really make your kitchen and bathroom shine. Once you have given them a good clean, apply some baby oil to your stove top and faucets and buff with a cloth. After you’ve done this, they will be so shiny they will double up as a mirror.

This article has shown you that it is possible to make the most of what you’ve got at home in an easy and affordable way. If you get the chance to try out some of these tips, I hope that you see as big an improvement to your home as I did.


Cori's Cozy Corner Disclosure Policy

Learn How To Brighten Up Your Home With These Amazing Ideas

This post may contain affiliate links.
Thank you for visiting Cori's Cozy Corner! Please make sure to like us on Facebook, follow us on Twitter and subscribe to our E-mails!

Have you ever looked around your home and thought to yourself that it looks pretty dark and depressing? If the answer is yes, you’ve come to the right place. The focus of today’s blog post is to explore the different ways that you can brighten up your home.

Once you try these amazing ideas, you’ll be happy with  how you’ve managed to transform your home into a bright and airy place! Keep reading to find out how.

4154593198_56050313ff_zFlickr / vickimoore

Stick with light color schemes

The golden rule to making your home bright and airy is to stick with light color schemes. Choosing bright green or terracotta red might have been a good idea at the time. But now that you have to live with it, it’s not!

However, light color schemes will make any home feel fresh and bright. They are also perfect for homes with small rooms, as light colors give the illusion rooms are bigger than they are! Your homeowner’s association management will also approve of you using light colors in your home.

Some folks opt to paint their walls white. Not only is this a neutral and light color, but white paint is also the cheapest color to buy too!

Less is more

Are you someone that has a lot of junk without even knowing it? If so, it’s time to have a spring clean and clear the clutter away from your home!

People often feel better about their homes when they know everything within them is organized and “has a place.” And when you store things away, it also means you have to spend less time cleaning your home.

Most of us lead busy lives, and so some folks decide to hire a cleaner for their homes. The trouble is; quite a few people are reluctant to do so if their home is messy! Keeping things in your home to a minimum resolves this problem and won’t make you feel guilty about hiring a cleaner.

Install some mirrors in your home

It doesn’t matter whether you love or loathe your personal appearance. Mirrors are great for reflecting light into any home, and therefore can make rooms brighter. Ensure that you position your mirrors for optimal light.

Even if reflecting light into your rooms isn’t a priority, mirrors will at least help you to avoid having a wardrobe malfunction!

Move your furniture around

Most of the time, furniture can get moved around with ease. There is nothing wrong with redesigning the layout of your rooms by moving your furniture around.

In fact, it’s a great way to make better use of the space in each room. Sometimes even moving just a couple of pieces of furniture can make all the difference!

If you own big, bulky furniture, it might be an idea to consider selling them and buying better-suiting items instead. For example, let’s say that you’ve downsized into a smaller home.

Your existing furniture might have looked great in the big rooms in your former home. But they will doubtless take up too much room in your smaller home.

Good luck!

Cori's Cozy Corner Disclosure Policy

Top Tips For Organizing A Kid’s Party

This post may contain affiliate links.
Thank you for visiting Cori's Cozy Corner! Please make sure to like us on Facebook, follow us on Twitter and subscribe to our E-mails!

“Mommy, I want a birthday party.” The sound of your kids asking for a party for the first time brings sheer horror with it. Twenty other little ones running wild through your house, breaking everything and getting their sticky hands all over the furniture can send shivers down your spine. The food fights, the food allergies, the possible choking incidents, are all scenarios that put pure fear in us.

The reality for a kid’s party isn’t likely to be quite so traumatic. After all, you have raised a perfectly sensible and well-behaved child. Your little one knows right from wrong. He knows how to behave in public and how to respect other people’s homes. Chances are, other parents have been just as successful as you, so give them the benefit of the doubt. Your child will be able to pick her friends. She is undoubtedly as good a judge of character as you are, so will pick all the best kids to come.

As a mother, you are very good at calming situations down, and organizing your kids well enough to get them to places on time and eat right. Use these skills at your party. You know very well it all starts with planning, so grab some paper and a pen, and get scribbling!

A kid’s party needs to look like a kid’s party, so start with streamers and balloons from places like www.balloonsgalore.co.uk or your local party store. You can grab some customized balloons for your child, or buy one for every kid attending as a party gift. You will also need to buy party bags with little gifts as a thank you for each child. They usually contain pots of bubbles and a slice of birthday cake, plus one or two other little cracker-type toys.

Buy some cheap plastic or vinyl table cloths to cover your tables. This will prevent damage from spills and make cleaning up after food so much easier. They can be themed if you are happy to spend a little more money. You will also want to use paper plates. Pick recycled and recyclable plates and cups to reduce the impact on the environment. If you have a good stash of plastic plates and cups, these are even better.

You will also want recycled paper table napkins in abundance. These are great for emergency mop-ups, wiping sticky fingers and wrapping up pieces of cake for the guests to take home. Again, these can be themed or have pictures of favorite kids characters.

275367_5d513ac051_z
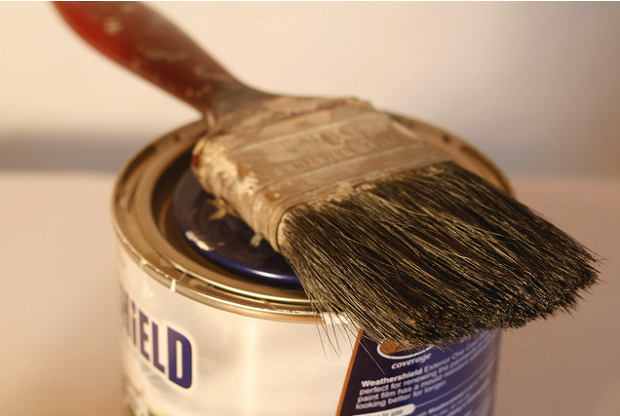
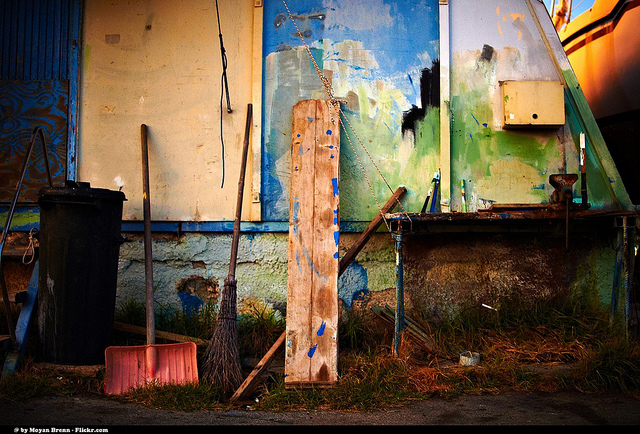
Image source Flickr.com

Think healthy for food. Fewer sweets and more fresh options are best, but it is a party, and kids are there to have a treat and fun. Home baked pizza, vegetarian samosas and veggie cocktail sausages, often go down a treat. Provide healthy smoothie, milk, or whole fruit juice drinks rather than squash or pop. If you are providing the entertainment yourself, popular games to play include Statues, Pass the Parcel, and Sleeping Lions. You can also try a treasure hunt game if you are ok with the kids rooting around the house or garden.

Cori's Cozy Corner Disclosure Policy

Free Recipe, Craft, and Hobby eBooks July 19, 2014

This post may contain affiliate links.
Thank you for visiting Cori's Cozy Corner! Please make sure to like us on Facebook, follow us on Twitter and subscribe to our E-mails!

Here’s a list of some of the FREE ebooks I found today on Amazon.
Grab them while you can as often they are only FREE for the day!

Looking for a certain type of eBook, let me know and I’ll keep an eye out.
Don’t have a Kindle?  Read eBooks using the FREE Kindle Reading App on Most Devices

kindle reading app

Cori's Cozy Corner Disclosure Policy

Muppets Most Wanted Inspired Nail Art Tutorials #NailArt #MuppetsMostWanted

This post may contain affiliate links.
Thank you for visiting Cori's Cozy Corner! Please make sure to like us on Facebook, follow us on Twitter and subscribe to our E-mails!

 Check out these fun Nail Art Tutorials inspired by Disney’s Muppets Most Wanted which will be in theaters March 21st, 2014. 
Which one will you try first?
I love the first one!
Click each image to go to it’s larger, printable image.

kermit nail art
 kermit piggy nail art interpol nail art moles nail art

Enhanced by Zemanta
Cori's Cozy Corner Disclosure Policy

How to Make a Fashion Book With Blurb

This post may contain affiliate links.
Thank you for visiting Cori's Cozy Corner! Please make sure to like us on Facebook, follow us on Twitter and subscribe to our E-mails!

How to make a fashion book with Blurb:
Blurb is a cool company that lets you make books about anything that interests you. And if you’re interested in fashion and style—and love to show it off—making a book of your personal fashion is a fantastic way to capture your sartorial genius for all time. Whether you want it just for yourself, so you can look through your greatest hits, or you’re a bit of an Internet fashionista who wants to make a book to sell, you’ll find these tips pretty helpful:

1. It’s all about lighting. To make your fashion really pop, choose natural light or studio light with a soft box (you can even make one from a lamp and last season’s white t-shirt). If you’re using a flash, you’ll probably want to bounce it or stick a diffusion filter on it.


2. Make a shot list. This is a critical step, and even more important if you are photographing models. Even if your model is just your best friend who owes you a favor, they’ll appreciate it if you know exactly what you want to shoot. Think about the poses you want to capture, the outfits you want them to wear, and the details that you want to highlight in every shot.

3. White balance (WB). Accurate color and skin tones come from making sure the WB function on your camera is set to your lighting situation.


4. Choose the right lens/zoom setting. If you’re using a wide angle, you’re going to lose your beautiful lines (and your model may never forgive you). If you have a camera with different zoom levels, zoom out to minimize lens barrel distortion.

5. Keep it stylish. It’s a fashion shoot, after all. Play music, keep things moving, try new angles. Attitude, attitude, attitude.


6. Dress it up. Make your book as fashionable as the clothing featured in it. Choose a simple design that doesn’t upstage the clothing, but still looks chic. Pick a size and paper type that showcases the work brilliantly.

If you’ve ever paid attention to what’s on the catwalk, you know that fashion means different things to different people. Follow your own fashion obsessions and document them in a fashionable book. If you look good today in person, imagine looking great forever on the printed page with Blurb!
Start your Blurb book now and Save 25% on print book orders of $75+ at Blurb.

Enhanced by Zemanta
Cori's Cozy Corner Disclosure Policy

Frozen – Friendship Fun FREE Printable Activities- Make a Princess Cape and Sister Bracelets!

This post may contain affiliate links.
Thank you for visiting Cori's Cozy Corner! Please make sure to like us on Facebook, follow us on Twitter and subscribe to our E-mails!

frozen

Make your own princess capes and honor a relationship with a sister or someone who is like a sister to you with sister bracelets!

Download Frozen Friendship Fun

Also, check out the interview below with the hair genius behind Elsa’s lovely locks! Celebrity hairstylist Danilo discusses what it’s like being part of the Disney family, how he came to be involved with the film, how to recreate Elsa’s do and much more!

AN INTERVIEW WITH CELEBRITY HAIR STYLIST DANILO (HAIR CONSULTANT FOR ELSA’S HAIR) FOR THE BLU-RAY AND DVD RELEASE OF FROZEN

Frozen is an epic tale of adventure and comedy from Walt Disney Animation Studios. In the film, fearless optimist Anna (voiced by Kristen Bell) sets off on an epic journey to find her sister Elsa (Idina Menzel), whose icy powers have trapped the kingdom of Arendelle in eternal winter. Encountering Everest-like conditions, mystical trolls and a hilarious snowman named Olaf, Anna teams up with a rugged mountain man named Kristoff (Jonathan Groff) to battle the elements in a frantic race to save the kingdom.

With Walt Disney Animation Studios’ Blu-ray and DVD of Frozen about to be released, we had the chance to chat with Danilo – hair designer and consultant for Elsa’s hair– to discuss what went into the creation of her beautiful snowy hair (made of 400,000 computer-generated threads).

How did you become involved in being a hair consultant for Elsa’s hair in Disney’s Frozen

I was contacted by the Frozen filmmakers to see if I’d be interested in the project. They wanted to collaborate with a hairdresser to explore creating the hair as it truly is and how it responds.

What was your preparation process like?

Preparing for Frozen is like preparing for any movie, in the sense that you first need to study the character and analyze her truths; her daily habits, her lifestyle and what nuances pervade her overall look and style. For instance, Elsa is a princess born with a special power and her character changes as the story progresses – when she is in an overwhelmed state of mind and her powers are concealed she has one look, and then she transfigures into a whole new look once she lets her powers be known.

What was your first day like?

Upon arrival at Disney, I was sequestered in an incredible studio set up especially for Frozen and its characters. The room had blown-up images of my work on the wall, including ones of a particular client of mine who also happens to have beautiful platinum hair. It really is no surprise that they had gone to that level of detail.  After all, it is Disney! My assistants and I set up our tripod, mannequin heads and our platinum wigs all in a row, and began the construction of 3 to 4 styles inspired by Elsa’s character at different stages in the movie.

Disney prepared everything for us, turned on the music and left us while cameras documented the work we were doing. They then returned after two or three hours with the director, producer, and all those involved artistically at this development stage.

Which filmmakers did you work with throughout the process?

I was delighted that the individuals who were artistically involved at this stage included the two animators responsible for the hair in Tangled.

After constructing and developing hairstyles for viewing purposes, I was introduced to a live model so I could showcase the hair designs to the Disney entourage.

It was at this point that the directors, producer, animators, and costume-designers arrived. The designers who transform onscreen animated figures into costumed characters for the Disney parks were there as well.

How does a live model help the creation process?

Using a live model is extremely helpful for demonstrating the character’s transitions through her hairstyles. With the model I was able to show real hair blowing in the wind and to show how to fold it into a chignon (twisted bun) — all of which are stages and features of Elsa’s particular hairstyle. This was all documented by handheld cameras, with me explaining Elsa’s hair and hairstyles, and describing her evolution in the story. 

How would you describe Elsa’s hairstyle?

Elsa’s hairstyle consisted of a tousled pompadour (hair swept upwards from the face and worn high over the forehead) flowing back into a thick mane of asymmetrically braided hair. I likened the pompadour to the silhouette of a crown.

She transforms from Princess to Queen with her side braided chignon, and the bouffant height of her pompadour is an outward example of her confident and powerfully regal status, ready to lead as queen, hopefully happily ever after.

What is it like being a part of the Disney family now?

It was a highlight of my career to be asked by Disney to work on a project with such talented and creative people. Having the chance to collaborate with this level of professionals is an incredible privilege.

To complete my work, and then return for the premiere of the movie and see the magic that the team achieved with Elsa’s character was breathtaking, humbling, and gratifying.

Have you given any celebrities a Frozen- inspired look since working on the film?

I most certainly have tried versions of this on clients, especially for red carpet appearances, or just a special night out. 

What are some tips on how fans can get Elsa’s look for their own hair in real life?

There’s a multitude of ways to create Elsa’s hair for your own pleasure. If you are fortunate enough to have that amount of hair to create the style, great; otherwise an added ponytail could achieve a very similar effect.  Also, it is always a good idea to bring a picture of Elsa with you to your hairdresser and ask them to reproduce it for you.

And if achieving a more exact version of Elsa’s hairstyle (the voluminous pompadour and side ponytail which can be braided and left down or pinned up into a chignon) is really important to someone, I would recommend purchasing a long platinum wig and having it cut and styled in just the right way. This would be a sure-fire way of duplicating that special look.

FROZEN IS NOW ON BLU-RAY, BLU-RAY 3D AND DVD

Enhanced by Zemanta
Cori's Cozy Corner Disclosure Policy

Enter To Win a Craftsy Class! Photography, Sewing, Painting, Quilting, Cake Decorating, and More!

This post may contain affiliate links.
Thank you for visiting Cori's Cozy Corner! Please make sure to like us on Facebook, follow us on Twitter and subscribe to our E-mails!

Looking to improve your skills or start a new hobby?  Craftsy has online classes for so many different hobbies such as photography, sewing, painting, quilting, cake decorating, and lots more.  I am so excited that Craftsy has selected my blog to giveaway a FREE class to one of my awesome readers.
Want to win a FREE Craftsy class?
Enter below:

Enter to win a Craftsy class!

Good luck!!!

Best Selling Craftsy Classes
Did you know that Craftsy currently has 361 classes in their catalog?  Craftsy has provided a list of their recommended classes in each category below.

Cake Decorating
Clean & Simple Cake Design
Cake Topper Techniques
How to Start a Cake Business

Food & Cooking
Artisan Bread Making
A Modern Take on the Mother Sauces
Classic Croissants at Home

Knitting
Knit to Flatter
Knit Original Toe-Up Socks
Knit Lab

Photography
Portraits With an On-Camera Speedlight
Photographing Flowers
Off-Camera Flash Photography

Quilting
Quilting Big Projects on a Small Machine
Free Motion Quilting a Sampler
Machine Quilting

Sewing
Tailoring Ready-to-Wear
Beginner Serging
Sewing With Knits

Cori's Cozy Corner Disclosure Policy